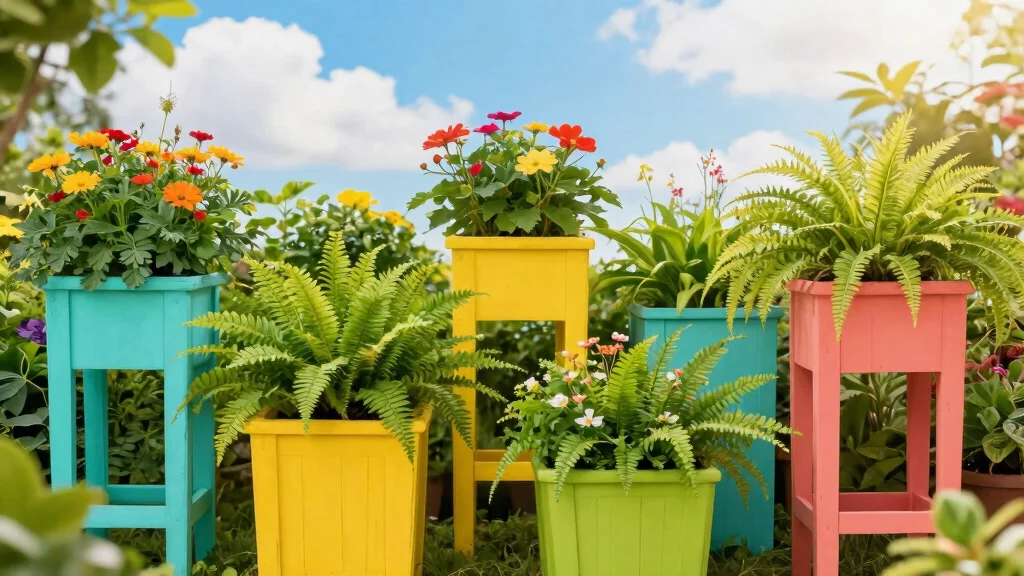
Creating an herb garden is not just about growing your favorite plants—it’s about infusing it with your unique personality. If you’ve been searching for ways to add a personal touch to your garden, you’re in the right place. I’ve gathered some fun and creative ideas for herb markers that will not only help you identify your plants but also enhance the overall look of your garden.
Whether you’re an experienced gardener or just starting out, you likely have a passion for growing fresh herbs. If you’re someone who enjoys DIY projects and loves to make your garden feel like home, you’ll appreciate these herb marker ideas. This post is perfect for you if you want to organize your herbs while expressing your creativity.
In this guide, you’ll discover nine fantastic herb marker ideas that are charming, easy to make, and sure to impress. From painted rocks to upcycled kitchen utensils, each idea brings a unique flair to your herb garden. Plus, these projects offer a great way to spend some time outdoors and connect with nature. Let’s dive into these ideas that will personalize your herb garden and make it feel truly yours!
Key Takeaways
– You’ll find nine creative herb marker ideas that help you identify your plants while enhancing the aesthetic of your garden.
– Each marker project is easy to make, using materials you may already have at home or can easily acquire.
– Personalization is key; these DIY herb markers let you showcase your style and creativity in your garden.
– Organizing your herb garden becomes fun with charming markers that not only serve a purpose but also decorate your space.
– These projects provide a wonderful opportunity to enjoy gardening while creating something beautiful and unique.
1. Painted Rock Markers

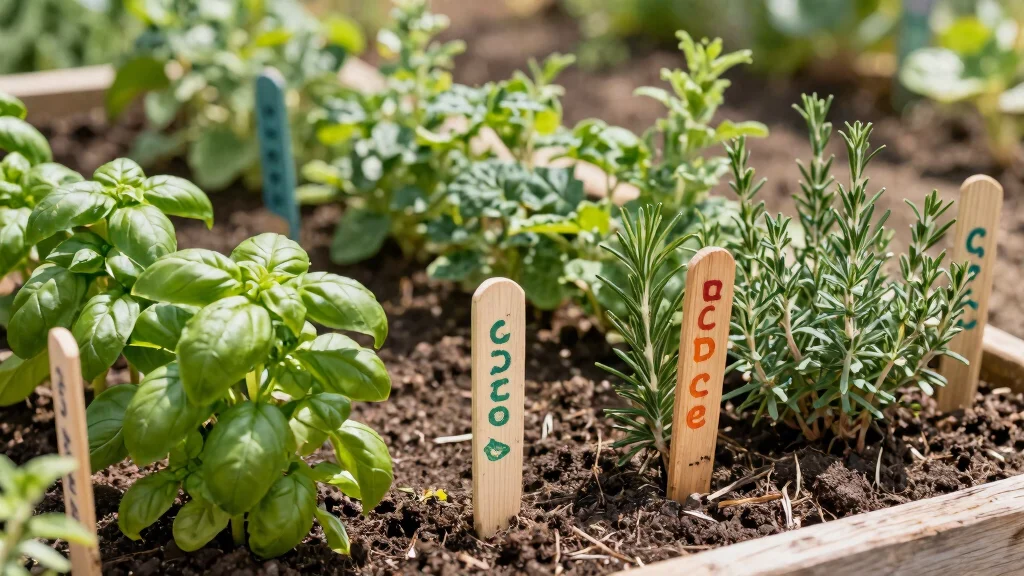
Looking to add a splash of color to your herb garden? Painted rock markers are a fun and creative way to label your plants while showcasing your artistic flair. With vibrant colors and unique designs, these markers not only help you identify your herbs but also brighten up your garden space with their natural charm.
To create your painted rock markers, gather smooth stones and some acrylic paints. Simply write the names of your herbs on the rocks, and feel free to add patterns or colors to make them stand out even more. You’ll love how they blend beautifully with the greenery while adding personality to your garden.
Ingredients:
– Smooth, flat stones (enough for each herb)
– Acrylic paint in various colors
– Outdoor sealant (for weather protection)
– Paintbrushes or sponges
Instructions:
1. Clean the stones to remove dirt and dust.
2. Once dry, start painting the names of your herbs on the stones.
3. Allow the paint to dry completely, and then seal with outdoor sealant.
4. Place the painted rocks beside the respective herbs in your garden.
FAQs:
– Can I use any type of paint? It’s best to use outdoor acrylic paint for durability.
– How long will they last? With a good sealant, they can last for several seasons.
Painted Rock Markers
Editor’s Choice

River Rocks for Painting 25 Pcs Large 2-3 Inch Flat Smooth Painting Ston…

Shuttle Art Acrylic Paint, 36 Colors Acrylic Paint Set with Brushes & Pa…
2. Wooden Stakes with Carvings
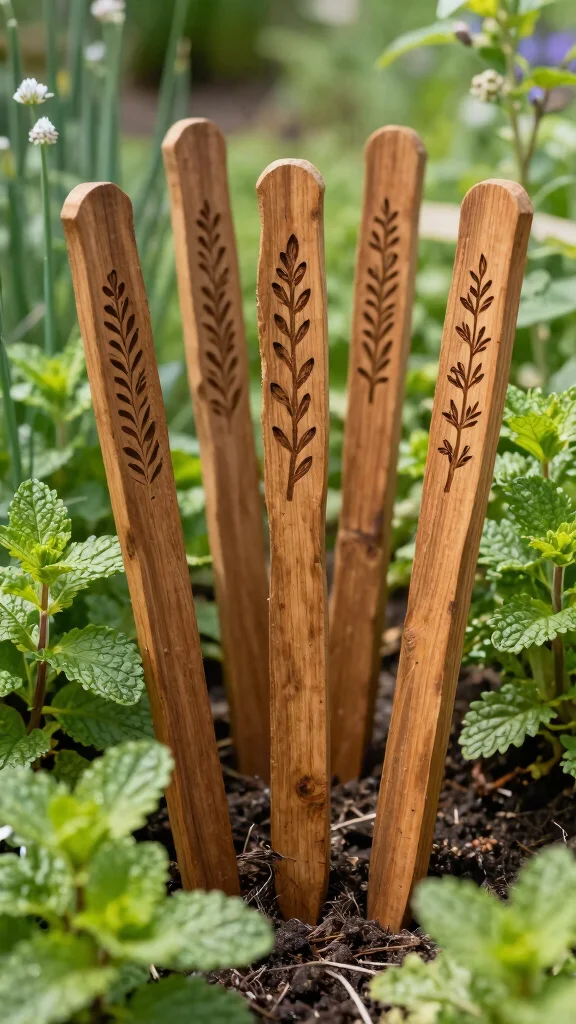
Want to bring a touch of rustic elegance to your herb garden? Wooden stakes make for charming markers that blend functionality and style. Carving the names of your herbs into untreated wood not only enhances their longevity but also adds an earthy, natural look to your garden space.
Choose wood that speaks to you and get ready to personalize your garden. You can leave them plain or paint them for a vibrant finish. These engraved wooden stakes will stand as proud markers among your herbs, reminding you of your gardening journey.
Ingredients:
– Untreated wooden stakes (one for each herb)
– Wood-burning tool or carving knife
– Wood oil (optional for protection)
Instructions:
1. Cut the wooden stakes to your desired height.
2. Use a wood-burning tool or carving knife to engrave the herb names.
3. Optionally, apply a coat of wood oil for extra moisture protection.
4. Place the stakes firmly in the ground beside each herb.
FAQs:
– Can I use treated wood? It’s better to use untreated wood to avoid chemicals leaching into the soil.
– How do I customize them further? Add decorative carvings or paint for a personal touch.
Wooden Stakes with Carvings
Editor’s Choice
100% Natural Wood Plant Markers – 10 Inches Tall – for Field and Garden …
Shuttle Art Outdoor Acrylic Paint Set, 12 Colors Waterproof Paint, 8.45o…

YIHUA 939-II Wood Burning Kit Station Pyrography Pen 250~750℃/482~1382…
3. Clay Pot Labels

Looking for a creative way to label your herbs while adding charm? Mini clay pots can serve as delightful labels that organize your garden and enhance its aesthetic. Writing the names of your herbs on these pots creates a cohesive look while offering a fun decorative element.
Paint or embellish the pots to match your garden style, and watch them become conversation starters among your friends. They not only serve a practical purpose but also bring a whimsical touch to your herb space.
Ingredients:
– Mini clay pots (one for each herb)
– Permanent marker or paint
– Twine, stamps, or decorative items (optional)
Instructions:
1. Write the herb names on the pots using a permanent marker or paint.
2. Decorate with twine or stamps if desired.
3. Place each pot next to its respective herb.
4. Arrange them on a tray for a stylish display.
FAQs:
– Can I use larger pots? Yes, larger pots can be used for more visibility.
– How can I make them last? Use weatherproof paint or sealant to protect them from the elements.
Clay Pot Labels
Editor’s Choice

DecoArt Patio Outdoor Paint Set – 9 Neon & Metallic Colors (2 fl oz Bo…

Whaline 12Pcs Herb Plant Label Signs 12 Styles Garden Herb Markers Thick…

Yishang 2.5 inch Terracotta Pots with Drainage Holes,Small Mini Clay Cer…
4. Upcycled Kitchen Utensils
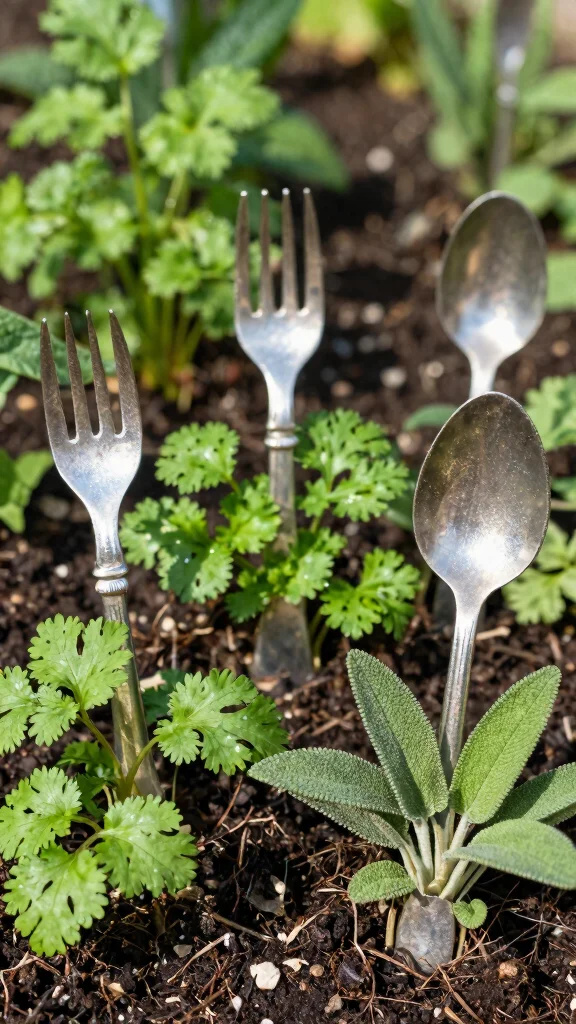
How about giving your old kitchen utensils a second life in the garden? Upcycled forks, spoons, and spatulas can become unique herb markers that not only serve a purpose but also tell a story. This quirky approach adds a nostalgic vibe to your garden while being environmentally friendly.
Simply write the herb names on the utensils and stake them into the soil. You’ll have a fun and eclectic garden that reflects your creativity and love for reusing materials.
Ingredients:
– Old kitchen utensils (forks, spoons, spatulas)
– Waterproof marker
– Wooden stakes (optional for support)
Instructions:
1. Clean the utensils thoroughly before use.
2. Write the herb names on the utensils using a waterproof marker.
3. Stake them into the soil beside the herbs.
4. Optionally, paint the handles for added flair.
FAQs:
– Can I use any utensils? Choose utensils with sturdy handles for better stability.
– How do I maintain them? Clean off any dirt after a rain to keep them looking fresh.
How To Choose the Right Herb Markers for Your Garden
When adding herb markers to your garden, you want to ensure they not only serve their purpose but also reflect your style. Selecting the right markers can enhance your garden decor while keeping your plants organized. Here are some factors to consider when choosing the perfect herb markers for your herb garden:
1. Material
The material of your herb markers can affect both durability and aesthetics. Common options include wood, metal, clay, and plastic. If you prefer a rustic look, wooden markers are great. For longevity, metal or ceramic can withstand the elements better. Consider where you will place them—if they are in a shaded area, fading may be less of a concern.
2. Size
Size matters when it comes to visibility and readability. You want your herb markers to be tall enough to stand out but not so large that they overshadow your plants. A height of 6-10 inches is usually ideal, as it allows easy visibility while being proportionate to most herb plants. Ensure the text or design is also large enough to be readable from a distance—at least 1 inch tall for the lettering.
3. Design Features
Think about the design features you want in your herb markers. Some markers come with a writing surface for easy labeling, while others are engraved or painted. Consider whether you want a more personalized touch, such as a custom design or specific color themes that match your garden decor. If you’re crafty, DIY options can be fun and unique.
4. Cost
Your budget plays a significant role in your selection. Herb markers can range from inexpensive DIY options to pricier pre-made ones. Determine how much you’re willing to spend before you start shopping. Remember, investing a little more in durable materials can save you money in the long run if they last longer.
5. Personalization
Personalization adds charm and uniqueness to your garden. Consider whether you want your herb markers to include specific plant names, garden themes, or even quotes. If you opt for DIY markers, you can create custom designs that reflect your personality, making your garden feel even more inviting.
6. Seasonal Changes
Think about the seasonal changes in your area. Some materials hold up better against rain, snow, or sunlight. If you have harsh winters, metal or weather-resistant plastic may be the best choice. On the other hand, if you live in a milder climate, wooden markers could add warmth to your garden.
Pro Tip:
To prolong the life of your herb markers, consider applying a sealant to wooden markers or using UV-resistant paint on others. This can help resist fading and damage from the elements, keeping your garden looking beautiful season after season.
Choosing the right herb markers can turn your herb garden into an organized and charming space. Assess these criteria carefully to find options that suit your gardening style and needs!
Upcycled Kitchen Utensils
Editor’s Choice

COSITA Pitch Fork for Garden, 44-Inches Pitchfork with Fiberglass Handle…

Fiskars Trowel, Heavy Duty Gardening Hand Tool with Hang Hole, For Diggi…

Whaline 24Pcs Acrylic Plant Label Signs 12 Styles Garden Herb Markers Pl…
5. Recycled Wine Corks
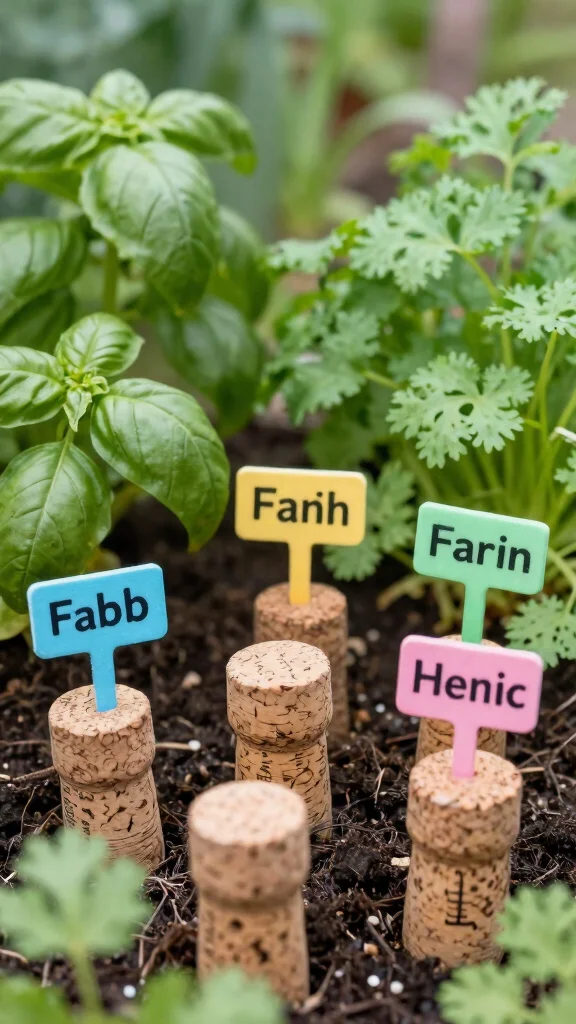
Do you have some wine corks lying around? They can easily be transformed into charming herb markers with just a bit of creativity. This eco-friendly approach not only saves materials from waste but also gives your garden a rustic charm that’s hard to resist.
Simply cut the corks in half, label them, and insert them into the soil. This simple yet effective method provides a playful way to identify your herbs while adding character to your garden space.
Ingredients:
– Used wine corks (one for each herb)
– Sharp knife for cutting
– Wooden skewers or sturdy sticks
Instructions:
1. Cut the corks in half with a sharp knife.
2. Write the herb names on each cork.
3. Insert a wooden skewer into the bottom of each cork.
4. Plant them in the soil beside the corresponding herbs.
FAQs:
– Are there specific corks to use? Any clean corks will work well, but use natural ones for a rustic look.
– Can I paint the corks? Absolutely! Painting them can add a vibrant touch.
Gardening on a budget? We all want quick wins for our herb garden. Recycled wine corks become charming herb markers in minutes—save money, curb waste, and add rustic character you’ll love.
You might also like
Recycled Wine Corks
Editor’s Choice

Glass Bottle Cutter, Upgraded Bottle Cutting Tool Kit, DIY Machine for C…

STARTOSTAR 30-Pack Metal Plant Labels Weatherproof Garden Markers,Height…

Mr. Pen – 4 Pack Garden Markers, Black, Waterproof, Outdoor & Seedling P…
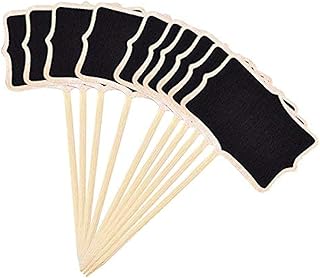
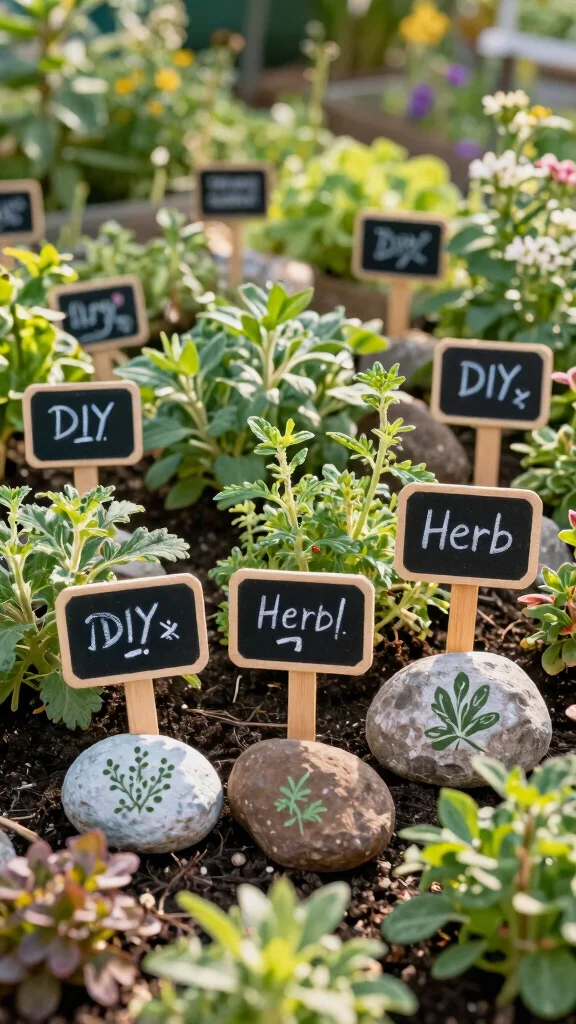
6. Chalkboard Labels

Want a flexible and stylish way to label your herbs? Chalkboard labels offer a modern twist on traditional markers. You can easily write and erase names, making them perfect for gardeners who like to switch things up.
These labels can be bought or made at home, allowing you to customize them to your heart’s content. Their sleek design adds a trendy flair to your garden while keeping it organized and neat.
Ingredients:
– Mini chalkboard stakes or wooden boards
– Chalk or waterproof chalk markers
– Twine or ribbon (optional for decoration)
Instructions:
1. If making your own, paint wooden boards with chalkboard paint.
2. Write the herb names using chalk or waterproof markers.
3. Place the stakes in the soil next to the herbs.
4. Decorate with twine or ribbon if desired.
FAQs:
– Are these weatherproof? Use waterproof markers to ensure durability against rain.
– Can I find these in different sizes? Yes, they come in various sizes for a unique look.
Chalkboard labels keep my herb markers tidy and flexible—write names once, erase, and swap as the herbs change. It’s a stylish, budget-friendly touch that grows with your garden projects. Labels that look good and stay neat? Yes to that.
📹 Related Video: DIY Blackboard Plant Labels (waterproof + erasable)
Chalkboard Labels
Editor’s Choice
KINGLAKE 20 Pcs Wood Chalkboard Plant Tag, Wooden Stakes Plant Labels Bl…
7. Fabric Labels
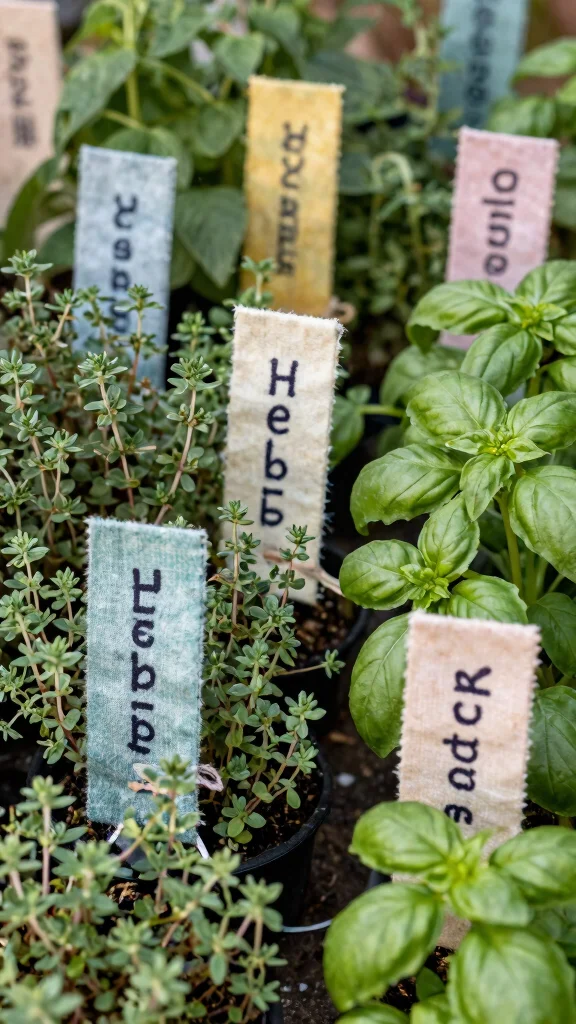
For a softer, more personalized touch, consider fabric labels made from old clothes or canvas. This method is not only charming but also adds a cozy element to your herb garden. Writing herb names on fabric gives you the opportunity to match the labels with your garden’s theme.
By sewing them onto stakes or tying them around plants, you can create a warm and inviting atmosphere that feels uniquely yours.
Ingredients:
– Old clothes or canvas fabric
– Fabric paint or permanent marker
– Twine or string for tying
Instructions:
1. Cut the fabric into small rectangles.
2. Write the herb names using fabric paint or a permanent marker.
3. Attach them to wooden stakes or tie them around the plants.
4. Mix various fabrics for a fun and artsy look.
FAQs:
– Is the paint weatherproof? Ensure you use weatherproof fabric paint for lasting results.
– Can I use any fabric? Choose fabrics that match your desired aesthetic for the garden.
Fabric Labels
Editor’s Choice

Easytle 2 Pack x 150 ft Stretch Tie Tape Roll, 1/2″ Garden Tie Tape, Thi…
Gardening Tools 9-Piece Heavy-Duty Garden Tools Set, Stainless Steel Gar…
8. Glass Jar Markers
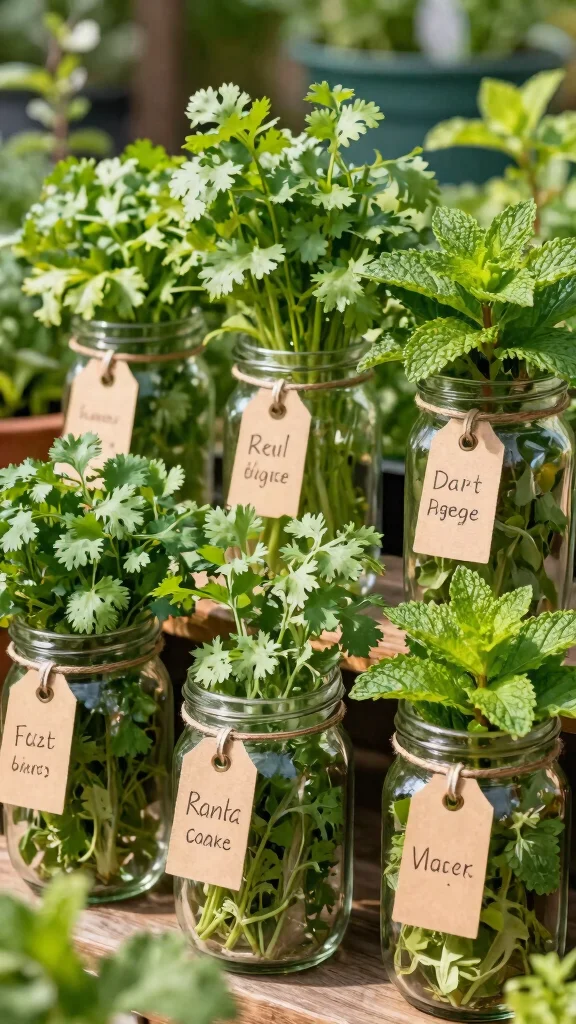
Looking for a unique way to label your herbs? Small glass jars can serve double duty as both markers and mini planters. Fill them with soil and plant your herbs inside, adding a tag with each herb’s name for a stylish display.
This creative approach not only organizes your garden but also creates a captivating visual element that draws the eye. Arranging the jars together can enhance the charm of your garden space.
Ingredients:
– Small glass jars (one for each herb)
– Soil for planting
– Decorative tags for labeling
Instructions:
1. Fill each jar with soil and plant the herbs inside.
2. Attach a decorative tag with the herb’s name to each jar.
3. Arrange the jars in a sunny spot in your garden.
4. Optionally, layer soil and sand for a beautiful effect.
FAQs:
– Can I use larger jars? Yes, larger jars can provide more space for the herbs.
– How do I maintain them? Ensure adequate drainage and water the herbs as needed.
You Might Also Like

Glass Jar Markers
Editor’s Choice

ComSaf 4 oz 6Pcs Glass Spice Jars with Label, Empty Spice Containers wit…

UPINS 24Pcs Acrylic Plant Labels Herb Plant Markers Plant Tags Signs wit…
9. Personalized Garden Signs

Want to elevate your herb garden with a touch of sophistication? Personalized garden signs are the perfect solution. You can order custom signs or make your own using wood or metal, adding a unique flair to your outdoor space.
These signs can feature your garden name or individual herb names, creating an inviting atmosphere that feels like a personal retreat. They’re not just labels; they’re reflections of your gardening style and passion.
Ingredients:
– Wood or metal for crafting signs
– Paint or engraving tools for customization
– Durable materials for weather resistance
Instructions:
1. Choose your materials and cut them to your desired size.
2. Customize with paint or engraving to show your garden’s personality.
3. Place the signs in prominent spots around your herb garden.
4. Add any additional details like your name or a favorite quote.
FAQs:
– What materials are best? Use durable materials like cedar or metal that can withstand the elements.
– Can I include quotes? Yes, feel free to personalize your signs with quotes or artwork.
Your herb markers are more than labels — they’re the personality of your garden. Create wooden or metal signs with your garden name and herb names, and watch every leafy corner feel like a personal retreat.
Personalized Garden Signs
Editor’s Choice

Whaline 24Pcs Wooden Plant Label Signs Planted Herb Garden Markers Plant…

6 Piece Culinary Herbs Set Laser Cut Metal Garden Markers – Reusable Her…

Custom Garden Metal Tin Signs Vintage with Your Own Photo/logo/Text, Per…
Conclusion
Personalizing your herb garden with creative markers can truly transform it into a beautiful, organized sanctuary.
These DIY herb marker ideas not only help you identify your plants but also reflect who you are as a gardener. Whether you’re using simple painted rocks or elegant personalized signs, each option adds charm to your space.
So go ahead, get inspired, and let your herb garden tell your story!
Note: We aim to provide accurate product links, but some may occasionally expire or become unavailable. If this happens, please search directly on Amazon for the product or a suitable alternative.
This post contains Amazon affiliate links, meaning we may earn a small commission if you purchase through our links, at no extra cost to you.
Frequently Asked Questions
What are the best materials for DIY herb markers that last in an outdoor herb garden?
Choose durable, weather-ready options like weatherproof wood signs, slate or ceramic tiles, metal tags, or upcycled spoons. Use herb markers that resist sun and rain. Seal wood with exterior varnish, apply UV-safe paint to metal, and consider a clear glaze on ceramic. For a budget option, repurpose bottle caps or wine corks with a permanent marker, then seal them. Pro tip: store markers in a labeled container for reuse next season. They can also add a touch of garden decor to your herb bed.
How can I personalize herb markers to make my garden signs both functional and decorative?
Turn each marker into a mini piece of garden decor by using color-coded categories, different fonts, and simple icons. Write the herb name and variety on the front, plus a Latin name or planting date on the back for easy herb garden organization. Use waterproof pens, then seal with a clear coat to keep lettering legible through rain. Choose shapes you love—round, rectangular, or tag-style—and keep a consistent look across all DIY herb markers.
How do I label herbs clearly to avoid mix-ups in a busy herb patch?
Label each patch with the common name plus the variety, and consider adding the Latin name for precision. Use two-line labels or color codes (green for culinary herbs, purple for pollinators) to boost readability. Place plant labels at or just above soil level so they’re easy to spot, and keep markers perpendicular to the row for quick scanning. This approach helps you save time during harvesting and maintain accurate herb markers.
What are some budget-friendly DIY ideas for DIY herb markers using everyday items?
Getting started is cheap and fun. Try chalkboard-painted wooden popsicle sticks, flat stones with a permanent marker, old wine corks with a metal pin, repurposed spoons engraved with a sharpie, or ceramic tiles with weatherproof ink. Attach markers with garden twist ties or hot glue to stakes, and seal everything with a spray sealant. These ideas double as plant labels and add character to your garden decor.
How can marker design support herb garden organization and easier garden maintenance?
Smart marker design keeps your garden tidy and productive. Use a consistent marker size and font, group herbs by sun exposure or category (cooking, tea, medicinal), and place markers close to each plant for quick identification. Update markers when herbs are moved or divided, and keep a simple digital or paper map of your patch to track varieties—this is herb garden organization at its best.
Related Topics
herb markers
DIY herb markers
plant labels
personalized garden signs
garden decor
herb garden organization
easy gardening
beginner friendly
outdoor crafts
edible gardening
seasonal gardening
creative gardening