
Creating a beautiful garden can feel overwhelming, especially when you’re looking for ways to make your outdoor space feel unique and inviting. That’s why I made this post about curved garden beds. These designs can transform your yard, adding a sense of flow and softness that straight lines often lack. If you’re looking to enhance your garden’s aesthetics while also improving its functionality, you’ve come to the right place.
This post is perfect for those who love gardening and want to explore creative landscape ideas. Whether you’re a seasoned gardener or a beginner just starting out, these curved garden beds ideas will inspire you to design a space that reflects your personality and meets your gardening needs. You’ll discover how to integrate elements like raised garden beds, companion planting, and decorative accents that elevate your garden’s charm.
By the end of this post, you’ll be equipped with ten fantastic ideas to make your garden more inviting and vibrant. Each idea offers practical tips and examples, ensuring you can easily implement them in your own yard. Get ready to unleash your creativity and bring a touch of softness to your outdoor space!
Key Takeaways
– Embrace the Spiral Design: This technique can create stunning focal points and maximize planting areas in smaller spaces.
– Wave of Color: Using curved beds allows you to plan color flows, ensuring your garden is lively and visually appealing throughout the seasons.
– Integrate Raised Curved Beds: These are great for accessibility and can add height variations, making your garden more interesting.
– Add Pathways: Curved pathways not only enhance the flow of your garden but also make it easier to navigate and maintain your plants.
– Blend Edible and Ornamental: Combining these elements in your design can create a functional yet beautiful garden that appeals to all senses.
1. Embrace the Spiral Design
A spiral garden bed introduces an exciting twist to traditional landscaping. This design cleverly maximizes your planting space and creates unique microclimates, allowing different plants to thrive in their ideal conditions. Picture sun-loving herbs nestled at the top while shade-tolerant varieties flourish below. It’s a vibrant solution that can transform any yard into a botanical haven.
To get started, build a sturdy base using materials like stone, wood, or even recycled items. Select an assortment of plants to take advantage of the varying sun and moisture levels throughout the spiral. You might also want to add decorative touches, like small stones or whimsical garden art, to elevate the visual appeal.
Key steps for creating a spiral garden:
– Build a stable foundation with suitable materials.
– Plant a diverse group of herbs to fill different levels.
– Add decorative elements for extra charm.
A well-planned spiral garden can become a stunning focal point in your outdoor space, showcasing a lush tapestry of colors and textures.
Fun Fact: A properly built spiral garden bed can boost planting space by up to 40% in a small footprint. The design creates microclimates, letting sun-loving herbs thrive at the top while shade-tolerant plants flourish below. Build the base with stone or wood for lasting curves.
Embrace the Spiral Design
Editor’s Choice

4-in-1 Soil Moisture Meter Digital PH Meter/Soil Moisture/Plant Temperat…

Land Guard Galvanized Raised Garden Bed Kit, Galvanized Planter Garden B…

Spoontiques – Garden Décor – Scatter Kindness Stepping Stone – Decorati…
2. Create a Wave of Color

Wavy garden beds can turn your yard into a colorful, flowing masterpiece. This design breaks the harsh lines of traditional landscaping, adding a natural rhythm to your space. By combining a variety of perennial flowers that bloom at different times, you can ensure your garden is alive with color from spring to fall.
For the best results, incorporate plants of varying heights to enhance the wave effect, placing taller flowers like sunflowers at the peaks and shorter ones in the valleys. Ground cover plants can also be used to soften edges and fill in gaps, providing a vibrant contrast to taller blooms. Don’t forget to slightly elevate the center of the wave for optimal drainage.
Tips for planting wavy beds:
– Choose plants with diverse heights for a dynamic look.
– Use ground covers to fill in spaces and add color.
– Elevate the center for better water drainage.
This engaging layout not only beautifies your garden but also encourages biodiversity, creating habitats for beneficial insects and wildlife.
Create a Wave of Color
Editor’s Choice

Wildflower Seeds Bulk 10000+, 1.06oz Butterfly Hummingbird Mix, 21 Varie…
3. Integrate Raised Curved Beds

Raised curved garden beds blend practicality with aesthetic appeal, making gardening easier and more enjoyable. These beds are perfect for those who might struggle with bending down, as the height provides easy access while promoting excellent drainage and soil management.
You can customize these beds to fit any size you need, accommodating a variety of plants. Their soft curves can soften the rigid lines of patios or decks, seamlessly integrating your garden into your outdoor living space. Opt for untreated wood, stone, or concrete blocks to keep your design natural.
Benefits of raised curved beds:
– Customize to any size for your gardening needs.
– Soft curves enhance the overall aesthetic of your yard.
– Use natural materials for an eco-friendly design.
This approach not only looks stunning but also adheres to permaculture principles, promoting soil health and diverse plant life.
Integrate Raised Curved Beds
Editor’s Choice

Yaheetech 8×2ft Wooden Horticulture Raised Garden Bed Divisible Elevate…

Burpee, 9 Quarts | Premium Organic Potting Natural Soil Mix Food Ideal f…
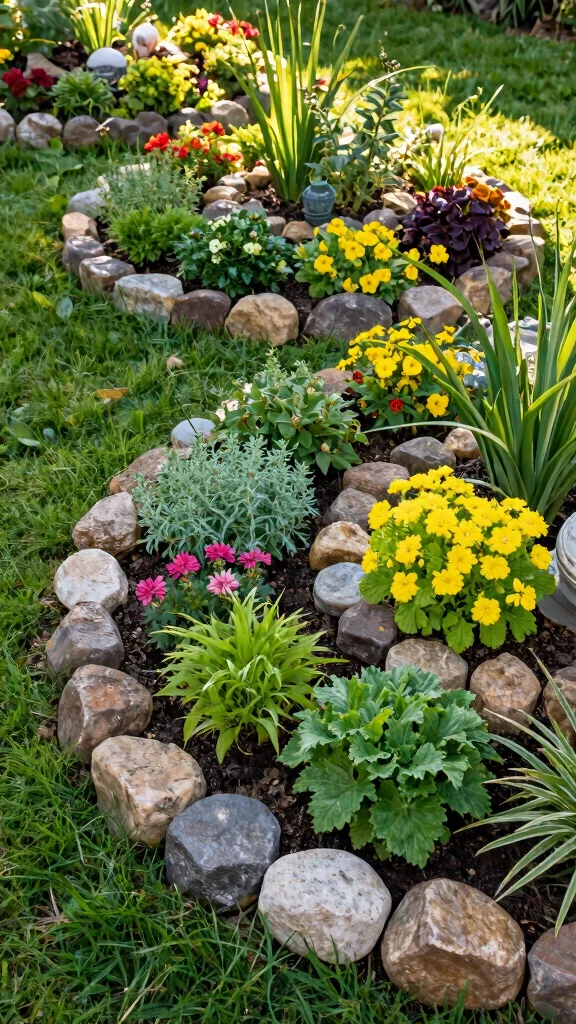
4. Add Pathways Between Curves

Pathways that wind through curved garden beds create an inviting sense of exploration. These walkways encourage you to wander through your garden, enhancing accessibility and providing a delightful experience. By using materials like gravel, mulch, or stepping stones, you define your pathways while complementing the shapes of your garden beds.
To achieve a harmonious look, select natural materials that blend with your surroundings. Ensure the pathways are wide enough for easy movement, especially if you plan on carrying tools or harvesting from your plants. Adding lights along the paths can create a magical atmosphere during evenings while improving safety.
Tips for designing pathways:
– Choose materials that harmonize with your garden’s colors.
– Ensure pathways are spacious for comfort and ease.
– Add lighting for safety and ambiance.
The combination of curves and pathways creates a welcoming environment that invites you to fully enjoy your garden.
Fun fact: Winding pathways through curved garden beds can increase perceived garden space by up to 30%. Choose gravel, mulch, or stepping stones to guide exploration, and keep materials natural so the curves feel harmonious and easy to navigate.
Add Pathways Between Curves
Editor’s Choice

4Pcs Large Stepping Stones Outdoor Garden Walkway, Durable Plastic Paver…

Mulctun 45LB Polished Black Pebbles,1/4″ – 3/4″ Small Black River Rocks …
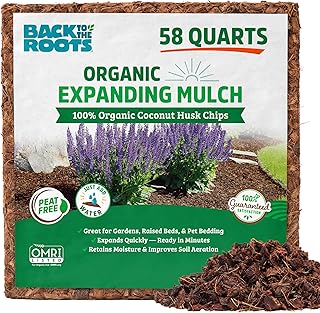
Back to the Roots 100% Organic Mulch, 58 Quart, Expanding Coconut Husk B…
5. Use Curves for Companion Planting

Curved garden beds are ideal for companion planting, allowing you to group plants that naturally benefit each other. This method boosts productivity and fosters diversity, attracting beneficial insects while deterring pests. Pairing plants with complementary growth habits can lead to healthier crops and a thriving garden.
For successful companion planting, consider pairing tomatoes with basil to enhance flavor while repelling pests. Mixing marigolds can deter nematodes, while grouping leafy greens with root vegetables maximizes space. This approach not only makes the garden more vibrant but also encourages a healthy ecosystem.
Companion planting examples:
– Pair tomatoes and basil for growth and flavor.
– Integrate marigolds to deter pests and attract pollinators.
– Group leafy greens with root vegetables for efficient space use.
By utilizing the natural shapes of curved beds, you can create functional and visually appealing plant combinations that thrive together.
Fun fact: Curved garden beds can carve out about 20% more planting area than straight beds, making it easier to pair tomatoes with basil and marigolds. This layout invites beneficial insects and deters pests through smart companion planting.
You might also like

Use Curves for Companion Planting
Editor’s Choice

Bonide Captain Jack’s Neem Oil, 32 oz Ready-to-Use Spray, Multi-Purpose …

Companion Planting for Beginners: Pair Your Plants for a Bountiful, Chem…
6. Incorporate Decorative Elements

Enhancing your curved garden beds with decorative elements allows you to express your unique style. Think about including sculptures, colorful stones, or charming birdhouses to elevate the visual interest while showcasing your creativity. These touches can also serve practical purposes, like providing habitats for beneficial wildlife.
Consider using vibrant stones or pebbles to outline your garden beds, emphasizing their curves. Incorporate garden art, such as metal sculptures or driftwood arrangements, to complement the natural beauty of your plants. Installing lightweight trellises for climbing plants can add height and dimension to your garden.
Ideas for decorations:
– Outline beds with colorful stones for added flair.
– Use garden art to enhance natural beauty.
– Add trellises for climbing plants to create vertical interest.
These decorative elements not only beautify your garden but also tell a story, inviting visitors to engage with your unique outdoor space.
📹 Related Video: DIY Garden Bed Edging anybody can do
Incorporate Decorative Elements
Editor’s Choice

Gardener’s Supply Company Corten Steel Garden Sculpture | 58″ High Artis…

Topadorn Hand-Painted Floral Wooden Bird House, 11″ Rustic Outdoor Birdh…

Virekm Landscaping Pebbles, River Rocks Decorative Ornamental Pebbles Ga…
7. Create a Multi-Layered Effect

Designing multi-layered curved beds lets you experiment with height and foliage, crafting a visually captivating garden. Layering provides structure while adding depth and variety to your plant selection. Position taller plants at the back and shorter ones at the front to create a stunning display that enhances your space’s overall dynamics.
Select plants that bloom at different times to ensure year-round interest. Trailing plants can soften edges and create a cascading effect, while diverse textures—such as spiky, fluffy, and leafy plants—add richness to your garden.
Tips for multi-layering:
– Choose plants with staggered bloom times for continuous beauty.
– Use trailing plants for a soft, cascading appearance.
– Include various textures for a rich visual experience.
This layered approach invites exploration, as each layer reveals delightful surprises.
How To Choose Curved Garden Beds
Choosing the right curved garden beds can elevate your outdoor space while making it functional. With a variety of styles, sizes, and materials available, you need to consider several factors to ensure you get the perfect fit for your garden. Here are some key points to guide you in your selection:
1. Size Matters
When selecting curved garden beds, size is crucial. Consider the dimensions of your yard and how much space you want to dedicate to the beds. Typically, a width of 4 feet allows for easy access from both sides. Make sure to leave space for pathways between beds, which will enhance accessibility and keep the design flowing.
2. Material Selection
The material you choose affects both aesthetics and durability. Common options include wood, metal, and stone. Wood is often favored for its natural look but may require treatment to withstand the elements. Metal can create a sleek, modern appearance, while stone provides a robust, timeless feel. Choose a material that complements your overall outdoor aesthetics while ensuring longevity.
3. Design Features
Think about the design features of the curved beds. Some designs offer raised edges which can help with drainage and soil quality. Others may include compartments for different plants or herbs. Consider how these features can enhance your planting tips and companion planting strategies, ensuring that your garden beds are not just beautiful but also functional.
4. Budget Considerations
Establish your budget before making a decision. Curved garden beds can range in price significantly based on size and material. While investing in higher-quality materials may cost more upfront, it can save you money in the long run due to reduced maintenance and replacement costs. Shop around for the best deals, and don’t forget to factor in any additional costs for soil and plants.
5. Maintenance Requirements
Consider how much time you can dedicate to maintaining your garden beds. Some materials require more upkeep than others. Wooden beds may need staining or treatment over time, while metal beds can withstand weathering better. Choose a style that fits your lifestyle, ensuring that it won’t become a burden later on.
6. Plant Compatibility
Before finalizing your choice, think about the types of plants you want to grow. Some plants thrive better in specific environments or soil types. Curved beds can accommodate a variety of plants, but you should ensure that your chosen design allows for adequate sunlight and drainage. Research the plants to ensure they will thrive in the curved beds you select.
Pro Tip: Visualize your design by sketching it out or using garden planning software. This will help you see how the curves will flow and fit into your space, making it easier to make adjustments before installation.
By considering size, material, design features, budget, maintenance, and plant compatibility, you can choose the perfect curved garden beds that will enhance your yard’s beauty and functionality. Happy gardening!
Create a Multi-Layered Effect
Editor’s Choice

Miracle-Gro Potting Mix – For Container Plants, Flowers, Vegetables, Shr…

LAVEVE Corrugated Metal Garden Edging 6″ x 40Ft, Landscape Edging Border…
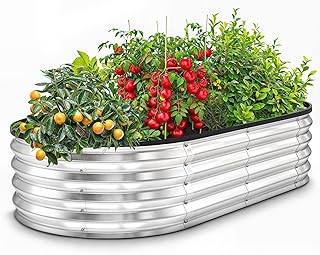
Utopia Home Galvanized Raised Garden Bed Kit 4x2x1ft, Planter Box Raised…
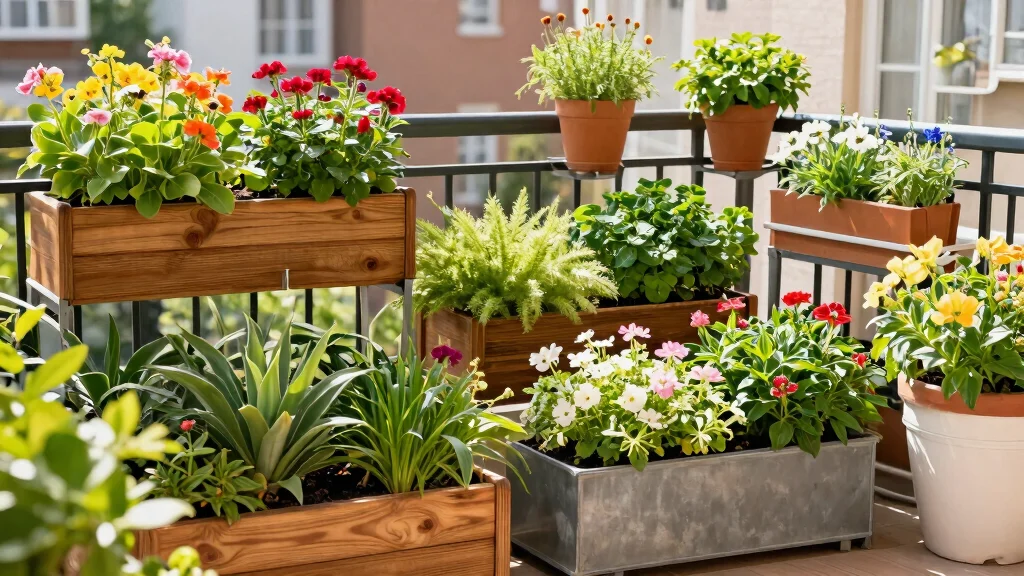
8. Blend Edible and Ornamental

Curved garden beds offer the perfect opportunity to blend edible and ornamental plants, creating a garden that’s both functional and beautiful. This approach maximizes your gardening space while producing an attractive display that can make your yard the envy of others. Mixing herbs, vegetables, and colorful flowers creates a vibrant and aromatic experience.
Use flowering herbs like chives or lavender to provide both beauty and flavor. Pair colorful vegetables, such as purple kale or red peppers, with bright blooms for a feast for the eyes. Position taller flowers towards the back and cluster lower-growing edibles in front for a balanced, harmonious look.
Tips for mixing edible and ornamental plants:
– Combine flowering herbs with vegetables for dual benefits.
– Pair colorful veggies with bright blooms for visual impact.
– Arrange taller flowers behind shorter edibles for a balanced design.
This integration not only enhances your garden’s beauty but also supports biodiversity by attracting pollinators and beneficial insects.
You Might Also Like


Blend Edible and Ornamental
Editor’s Choice

Seed Needs Edible Wildflower Seed Packet Collection (7 Varieties of Flow…

Set of 43 Assorted Vegetable & Herb Seed Packets – Over 10,000 Seeds! – …
9. Create an Herb Spiral
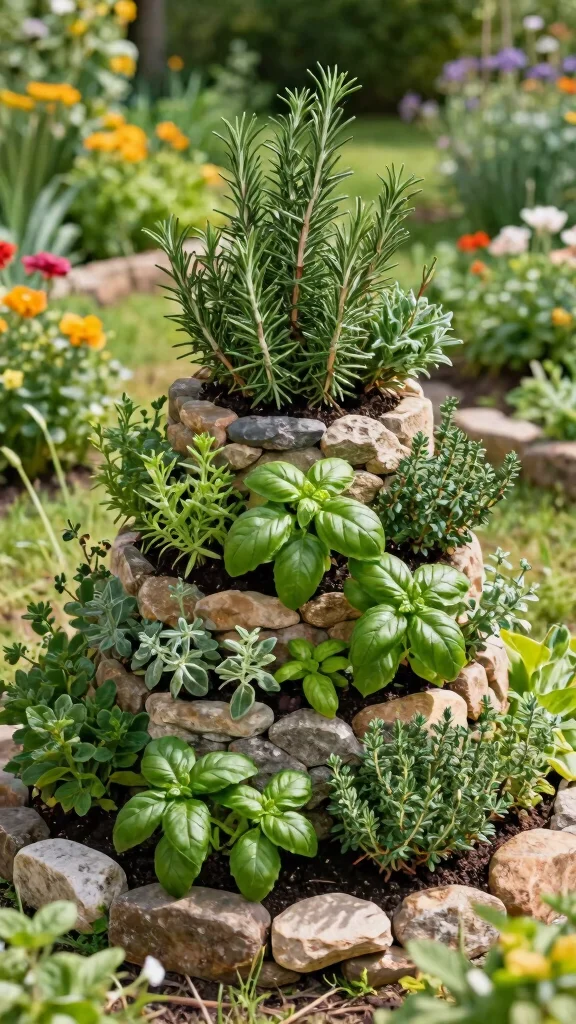
An herb spiral is a creative way to use a curved garden design to cultivate various herbs in a compact area. This structure maximizes vertical space while offering diverse growing conditions, ranging from sun exposure at the top to moisture retention at the bottom. It’s an excellent method for organizing your herbs while keeping them easily accessible.
Start by placing taller herbs like rosemary at the top and arrange shorter ones like basil on the lower levels. Incorporate stones or bricks for structural support to prevent soil erosion. You might also consider including a small water feature or rain catchment system to enhance sustainability.
Tips for designing an herb spiral:
– Place taller herbs at the top for optimal sun exposure.
– Use stones to create structure and prevent erosion.
– Consider adding a small water feature for sustainability.
This functional and eye-catching design can become a centerpiece in your garden, encouraging culinary exploration and visual enjoyment.
Create an Herb Spiral
Editor’s Choice
Landscape Edging Garden Edging Border Faux Stone Edging,17FT x 2.75 in T…

Herb Garden Starter Kit – Fruivity 12800+ 15 in 1 Herb Heirloom Seed K…
10. Surround Your Curved Beds with Native Plants

Surrounding your curved garden beds with native plants boosts their beauty while supporting local ecosystems. Native plants thrive in your area’s climate and soil, making them more resilient and easier to care for. They create habitats for beneficial wildlife and offer a natural look that integrates beautifully with your garden beds.
Using native plants requires less water and maintenance, saving you valuable time and resources. These plants attract pollinators, like bees and butterflies, enhancing your garden’s biodiversity. Additionally, they can fill in gaps around your curved beds, providing a lush, cohesive appearance.
Benefits of using native plants:
– Require less water, saving you time and effort.
– Attract pollinators to boost your garden’s biodiversity.
– Fill gaps for a lush, integrated look.
Incorporating native plants not only enhances your garden’s appeal but also fosters sustainability and supports local wildlife.
Surround Your Curved Beds with Native Plants
Editor’s Choice
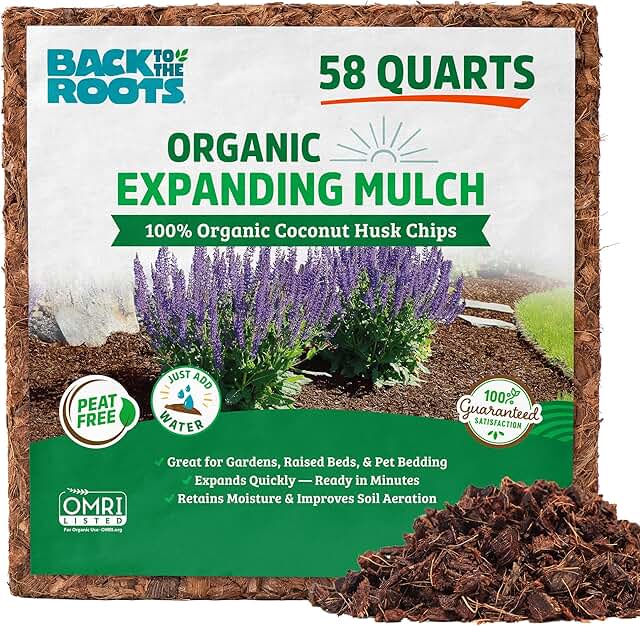
Back to the Roots 100% Organic Mulch, 58 Quart, Expanding Coconut Husk B…

California Wildflower Mixture – Bulk 1 Ounce Packet – Over 7,000 Native …
Conclusion

Incorporating curved garden beds into your landscape design brings a blend of aesthetics and functionality, adding softness and flow to your outdoor spaces.
Whether you opt for a spiral design, wave patterns, or mix edibles with ornamental plants, the possibilities are endless. Embrace these ideas to cultivate a garden that reflects your style and supports sustainable practices.
Now is the perfect time to start planning your own curved garden bed adventure!
Note: We aim to provide accurate product links, but some may occasionally expire or become unavailable. If this happens, please search directly on Amazon for the product or a suitable alternative.
This post contains Amazon affiliate links, meaning we may earn a small commission if you purchase through our links, at no extra cost to you.
Frequently Asked Questions
What Are the Benefits of Curved Garden Beds in Permaculture Design?
Curved garden beds soften hard edges and create more edge area for planting, which is a big win in permaculture design.
They help capture rainwater along the arc, slow runoff, and create microclimates for diverse plants.
They also integrate well with raised garden beds and contribute to a harmonious landscape design and practical garden bed plans for your yard.
How Should I Plan Curved Garden Bed Layouts for Raised Garden Beds in a Small Yard?
Begin with a space measurement and a to-scale plan that uses curved lines instead of straight rows.
Use garden bed plans to map curves, paths, and zones, then pick bed heights and materials that fit your reach and maintenance routine.
Align the curves with sun exposure and existing features, and leave wide, clear aisles for easy care.
What Planting Tips Work Best for Curved Garden Beds to Maximize Yield and Aesthetics?
Plant along the curves rather than in rigid grids to boost flow and harvest opportunities.
Cluster compatible plants in the curves’ inside and outer edges, with taller species toward the back of inner arcs and trailing or ground-covering plants along the outer rim.
Choose crops with similar water needs, mulch to reduce evaporation, and use succession planting for a longer harvest and practical planting tips.
Are Curved Beds Better for Drainage and Soil Health Compared to Straight Beds?
Curves can slow water flow and improve infiltration, which supports better drainage and soil health.
If drainage is a concern, combine curved beds with raised garden beds or add deep soil amendments like compost to boost structure.
Keep the soil well-mixed and mulched to maintain steady moisture and a healthy growing environment.
How Can I Maintain Outdoor Aesthetics While Keeping Functionality in Curved Garden Beds?
To maintain outdoor aesthetics while staying practical, mix textures and colors along the curve with a thoughtful palette of perennials, herbs, and blooms.
Pair curved edges with cohesive edging materials and consider focal points to enhance the landscape design.
Regular pruning, seasonal planting rotations, and mulch keep curved garden beds looking fresh and easy to care for.
Related Topics
curved garden beds
landscape design
raised garden beds
outdoor aesthetics
garden bed plans
permaculture design
planting tips
beginner friendly
DIY gardening
soft landscaping
creative gardening
seasonal planting