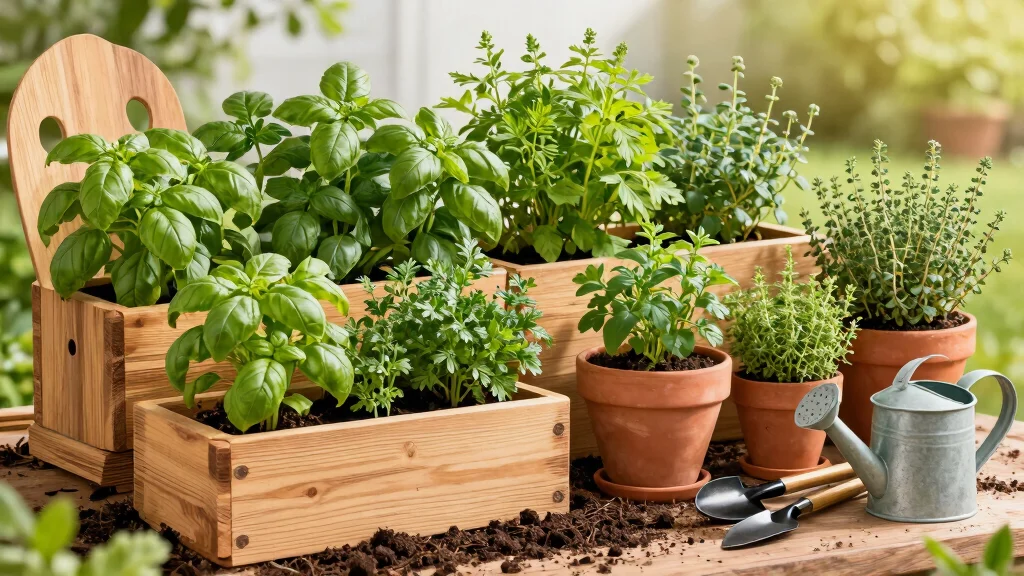
Gardening season is upon us, and if you’re anything like me, you’re craving fresh herbs to liven up your meals. There’s something magical about stepping outside and snipping a few sprigs of basil or parsley right from your own herb boxes outdoor. It just transforms your cooking into something special. But let’s face it, not everyone has a sprawling backyard. If you’re dealing with limited space or a tight budget, don’t worry. That’s what this post is all about!
If you love gardening but find yourself in a small space or on a budget, you’re in the right place. Whether you’re a seasoned gardener or just starting out, these ideas will help you create a thriving outdoor herb garden. I’ve rounded up nine creative ways to build herb boxes that are not only budget-friendly but also perfect for those little corners of your patio or balcony. You’ll find inspiration that combines practicality with flair, ensuring that you can enjoy fresh herbs without breaking the bank.
In this post, you’ll discover DIY vertical herb boxes, unique repurposing ideas, and even some clever use of recycled materials. Each idea is designed to help you maximize your space and grow your favorite herbs with ease. Get ready to dive in and find the perfect options for your outdoor herb garden!
Key Takeaways
– Discover nine budget-friendly herb box ideas that bring fresh flavors right to your kitchen.
– Learn how to create a DIY vertical pallet herb garden that saves space and adds charm.
– Explore repurposed materials like wooden crates and plastic bottles that make for creative herb planters.
– Find practical tips for arranging your herb boxes to ensure they thrive in small spaces.
– Enjoy the satisfaction of growing your own herbs while saving money and enhancing your meals.
1. DIY Vertical Pallet Herb Garden

Are you looking to maximize your outdoor space while adding a touch of rustic charm? A DIY vertical pallet herb garden is a fantastic solution that lets you grow fresh herbs without taking up too much room. Just lean an old wooden pallet against a wall and transform it into a vibrant herb display that’s both practical and eye-catching.
Fill the slats with nutrient-rich soil and plant your favorite herbs like mint, chives, or cilantro for a fragrant addition to your cooking. This project is not only budget-friendly but also allows you to get creative with your outdoor decor.
Ingredients:
– 1 sturdy wooden pallet
– Quality potting soil
– A selection of herbs (mint, chives, cilantro)
Instructions:
1. Choose a wooden pallet that is in good condition and free from harmful chemicals.
2. Sand down any rough edges for safety.
3. Optional: Paint the pallet for a fun pop of color.
4. Fill the slats with potting soil, ensuring good coverage.
5. Plant your herbs, spacing them evenly for growth.
6. Position the pallet in a sunny spot and water regularly.
FAQs:
– Can I use a pallet that’s been treated? Avoid treated pallets as they may contain harmful chemicals.
– Can I grow herbs indoors? Yes, just ensure they receive plenty of sunlight.
DIY vertical pallet herb gardens turn small spaces into thriving herb boxes outdoor. Lean a pallet against a wall, fill the slats with soil, and harvest mint, chives, or cilantro in as little as 4 weeks.
Cost Breakdown & Budget Planning
Planning your outdoor herb garden doesn’t have to break the bank. Let’s break down the costs involved so you can grow fresh herbs without stress.
Cost Breakdown by Category:
– Materials/Products: Expect to spend between $20 to $200. This can vary based on the size of your herb boxes and the type of materials you choose—wood, plastic, or metal.
– Tools/Equipment: If you need tools, budget around $15 to $100. Basic gardening tools like trowels, gloves, and watering cans are must-haves.
– Labor/Professional installation: If you prefer hiring someone, costs can range between $50 to $300, depending on the complexity of your design and local labor rates.
– Optional extras: Think about seeds, fertilizers, and decorative items. Budget around $10 to $50 for these additions to enhance your garden’s look and productivity.
Budget Tier Breakdown:
Basic Economy Tier $
– What’s included: Minimal equipment and materials like wooden crates or recycled containers.
– Good for: Beginners or those with very limited space or budget.
– Limitations: You might miss out on durability and aesthetics. Your herb boxes may not last long or look as polished as pricier options.
Mid-Range Tier $$
– What’s included: A balance of quality materials like treated wood or well-designed containers.
– Good for: Casual gardeners wanting a nice outdoor herb garden without overspending.
– Best value for: Most people looking for a decent blend of cost and quality. You’ll get sturdy boxes that look good and last longer.
Premium Tier $$$
– What’s included: High-quality materials like concrete or custom-built herb boxes.
– Good for: Serious gardeners investing in long-lasting and visually appealing designs.
– Worth it if: You plan to grow herbs for years or want a unique design that stands out in your yard.
Money-Saving Tips:
– Use recycled materials: Look around your home for items like old crates or pallets. They work great and save money!
– Buy seeds instead of plants: Starting herbs from seeds costs less and gives you a wider variety to choose from.
– DIY tools: Create your own planters from things you have, like plastic bottles or tin cans. Get creative!
– Group purchase: Team up with neighbors to buy materials in bulk. This often reduces costs significantly.
Where to Splurge:
– Soil quality: Investing in good potting soil can improve plant health and yield. Quality soil means healthier herbs!
– Irrigation systems: If you have a larger garden, consider a drip irrigation system. It saves time and water in the long run.
– Durable containers: Spending a bit more on sturdy planters can save you money down the road. You’ll avoid replacing cheap ones every season.
By following this guide, you can create a thriving outdoor herb garden that fits your budget. With careful planning and a little creativity, you can enjoy fresh herbs right from your yard without overspending! 🌱💚
DIY Vertical Pallet Herb Garden
Editor’s Choice

Seed Needs Herb Seeds Variety Pack Culinary Herb Collection (12 Individu…

Burpee, 9 Quarts | Premium Organic Potting Natural Soil Mix Food Ideal f…
2. Repurposed Wooden Crates

Have old wooden crates lying around? Turn them into stylish herb boxes for your garden! These versatile crates can fit snugly on porches, balconies, or in sunny corners of your yard, adding a charming touch to your outdoor space. They’re perfect for creating a mini herb garden without breaking the bank.
By planting colorful herbs like rosemary, oregano, and thyme, you’ll not only save money but also enjoy a delightful burst of flavor in your meals. Get ready to elevate your garden design with a personal touch.
Ingredients:
– 2-3 wooden crates
– Potting soil
– Selection of herbs (rosemary, oregano, thyme)
Instructions:
1. Drill drainage holes in the bottom of each crate.
2. Optional: Paint or stain the crates with non-toxic treatments for a personalized touch.
3. Fill the crates with potting soil, leaving some space for the herbs.
4. Plant a variety of herbs, ensuring they have enough room to grow.
5. Place the crates in a sunny area and water as needed.
FAQs:
– Can I use any type of crate? Ensure the crate is untreated and safe for planting.
– Can I grow herbs indoors? Yes, just make sure they get enough sunlight!
📹 Related Video: The crate hack that’s BLOWING UP on Pinterest!
Repurposed Wooden Crates
Editor’s Choice

Grenebo Gardening Tools 9-Piece Heavy Duty Garden Hand Tools with Fashio…

Best Choice Products Raised Herb Garden Bed Planter Box – Elevated Woode…

Sereniseed Certified Organic Herb Seeds (10-Pack) – Non GMO, Heirloom …
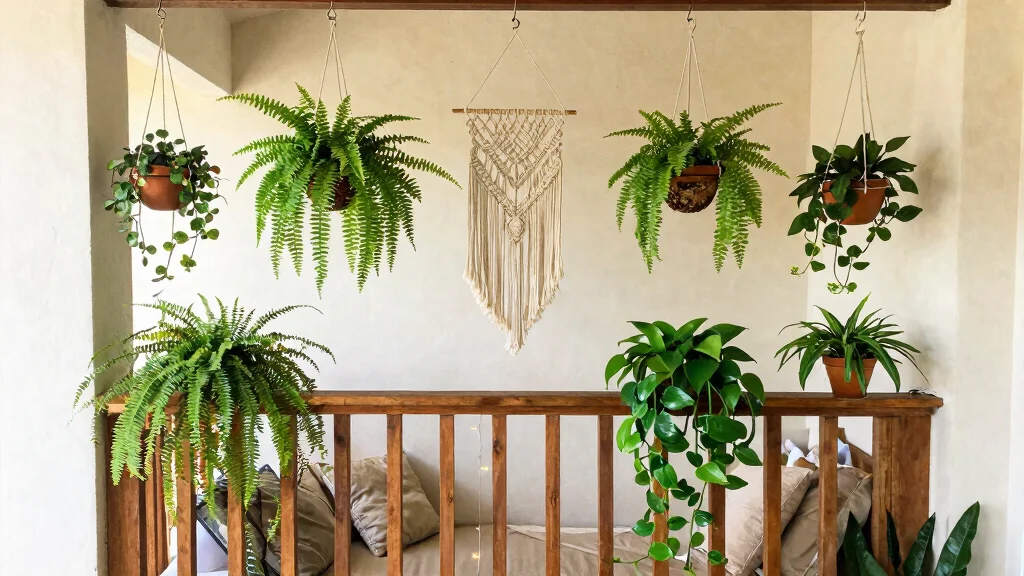
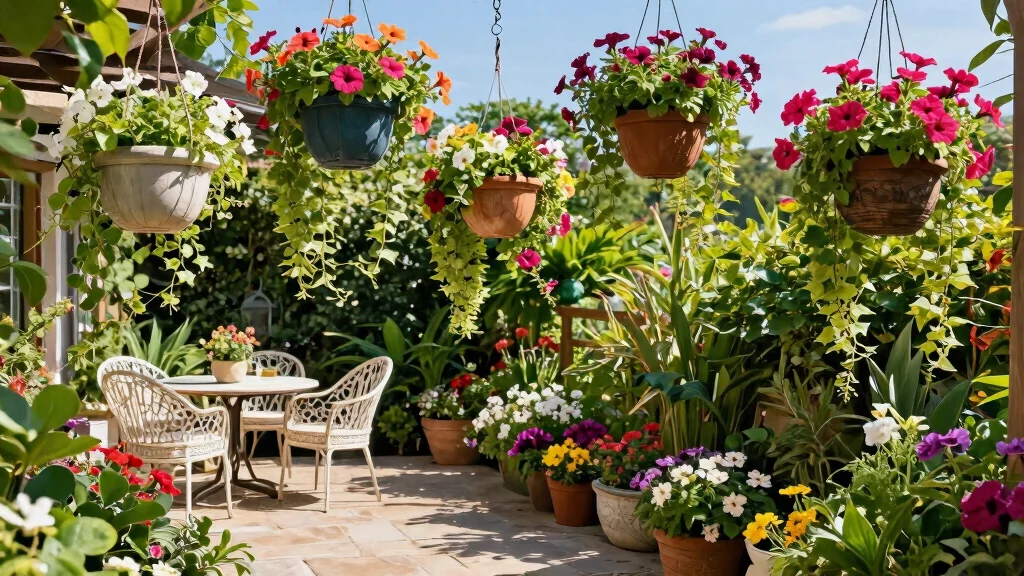
3. Hanging Herb Planters

Short on space but still want fresh herbs? Hanging herb planters are the perfect solution! These planters can be suspended from hooks or railings, adding a decorative element to your outdoor area while saving precious ground space. Imagine vibrant herbs cascading down, ready for your culinary creations.
Choose herbs that drape beautifully, like trailing thyme or sweet basil, to create a stunning visual effect. With just a little creativity, you can have a lush herb garden even in the tightest of spots.
Ingredients:
– Lightweight pots or fabric planters
– Selection of herbs (trailing thyme, sweet basil)
Instructions:
1. Select lightweight pots to make hanging easier.
2. Fill with potting soil suitable for herbs.
3. Plant herbs that have a trailing nature for added aesthetics.
4. Hang the planters at varying heights for visual interest.
5. Water regularly, keeping the soil moist but not soggy.
FAQs:
– Can I use heavy pots? It’s best to stick with lightweight options to avoid strain.
– Can I grow herbs indoors? Yes, as long as they get enough sunlight and air circulation.
Hanging Herb Planters
Editor’s Choice

Thyme Seeds Pack 0.5 G – Over 1,350 Non-GMO Heirloom Thyme Seeds for Pla…

TOREVSIOR 5-Tier Vertical Raised Garden Bed, Vertical Garden Planter wit…
4. Recycled Plastic Bottles

Looking for a creative way to garden sustainably? Turn recycled plastic bottles into unique herb planters! This eco-friendly project is easy on the wallet and an excellent way to contribute to a greener earth while growing your own fresh herbs. All it takes is a little cutting and some soil to get started.
Fill them with potting soil and plant herbs like parsley and cilantro for a quirky touch to your garden. Plus, you can personalize these planters with paint or twine, making them a fun addition to your outdoor decor.
Ingredients:
– Clean plastic bottles (2-3)
– Potting soil
– Herbs (parsley, cilantro)
Instructions:
1. Cut the plastic bottles in half to your preferred height.
2. Puncture drainage holes at the bottom to avoid waterlogging.
3. Fill with potting soil, leaving room for herbs.
4. Plant your selected herbs and water gently.
5. Decorate the outside with paint or twine if desired.
FAQs:
– Can I use any type of plastic bottle? Yes, as long as it’s clean and free from harmful chemicals.
– Can I grow herbs indoors? Yes, just ensure they have adequate light.
Did you know a 2-liter bottle can become a tiny herb box for parsley or cilantro? Reusing bottles for herb boxes outdoor can slash planter costs by up to 50% and cut waste in half. A quick cut, soil, and paint, and fresh herbs are yours.
Recycled Plastic Bottles
Editor’s Choice
Grenebo Gardening Tools 9-Piece Heavy Duty Garden Hand Tools with Fashio…

Miracle-Gro Potting Mix – For Container Plants, Flowers, Vegetables, Shr…

Apple Barrel, Vibrant Spectrum Collection Acrylic Craft Paint, PROMOABII…
5. Brick-Wall Herb Garden
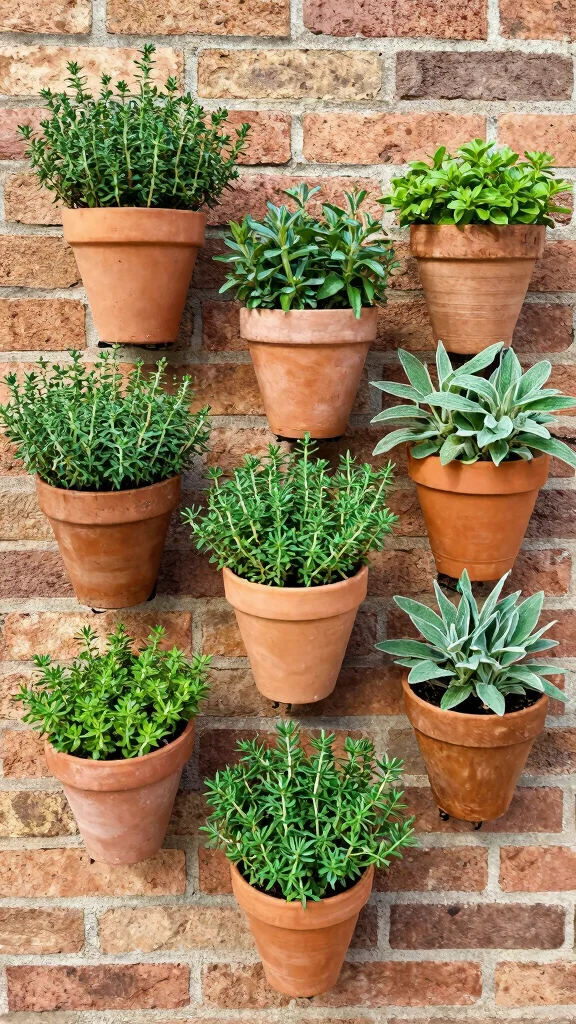
Want to transform a bland brick wall into a stunning herb garden? This creative idea utilizes vertical space beautifully while serving as a striking backdrop for your outdoor area. You can use small pots or even plant directly into the wall if it’s suitable, creating a lively herb display that’s both functional and attractive.
Choose herbs that thrive in full sun, like thyme and sage, to make the most of your garden space. This approach not only enhances the aesthetics of your garden but also provides fresh herbs at your fingertips.
Ingredients:
– Terracotta pots
– Potting soil
– Herbs (thyme, sage)
Instructions:
1. Select terracotta pots for their classic look.
2. Fill each pot with quality potting soil.
3. Plant herbs that enjoy sunlight and water them appropriately.
4. Position the pots against the wall or plant directly if possible.
5. Ensure that water drains well to promote healthy growth.
FAQs:
– Can I use other types of pots? Yes, just ensure they have good drainage.
– Can I grow herbs in shady areas? Some herbs tolerate shade, but most prefer full sun.
You might also like

Brick-Wall Herb Garden
Editor’s Choice

11″H x 9.5″ Dia Aged Terracotta Clay Planter Pot with Drainage Hole, Rus…

Sow Right Seeds – Thyme Seed for Planting – Non-GMO Heirloom Packet with…

G TALECO GEAR 5-Tier Vertical Garden Planter, 4.4Ft Vertical Raised Gard…
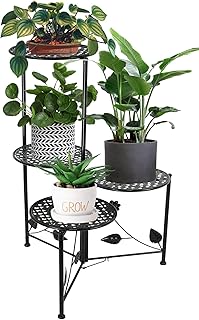
6. Tiered Plant Stands
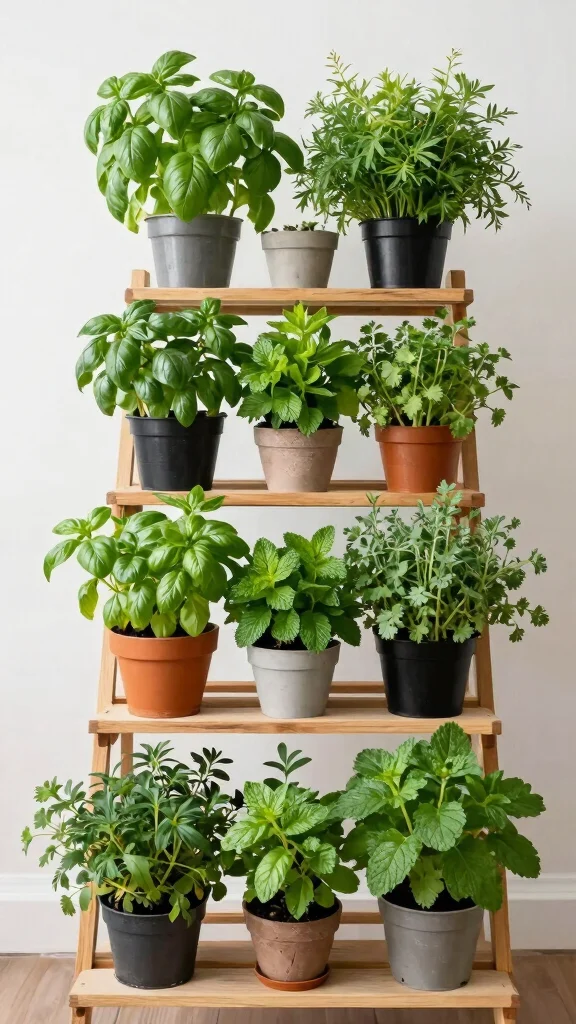
Maximize your garden space with tiered plant stands! These stands offer a stylish way to create a vertical herb garden that adds depth and dimension to your outdoor area. You can often find tiered stands at garden centers, or you can DIY one with a bit of creativity.
Mix and match different herbs on each level to create an eye-catching display. This method not only helps keep your herbs organized but also makes accessing them easier.
Ingredients:
– Tiered plant stand
– Potting soil
– Variety of herbs
Instructions:
1. Set up the tiered plant stand in a sunny location.
2. Fill each level with potting soil.
3. Plant different herbs in each tier for diversity.
4. Water as needed, ensuring good drainage on each level.
5. Enjoy the visual appeal and easy access to your herbs.
FAQs:
– Can I use any plant stand? Yes, just ensure it’s sturdy and can hold the weight.
– Can I grow flowers too? Yes, you can mix herbs and flowers for a colorful display!
Tiered Plant Stands
Editor’s Choice

Simple Trending 3 Tier Metal Plant Stand Outdoor Indoor Waterproof, Stac…
NAKUPE Plant Stand Indoor Outdoor, 4 Tier Corner Metal Flower Display Ho…
Simple Trending 3 Tier Metal Plant Stand Outdoor Indoor Waterproof, Stac…
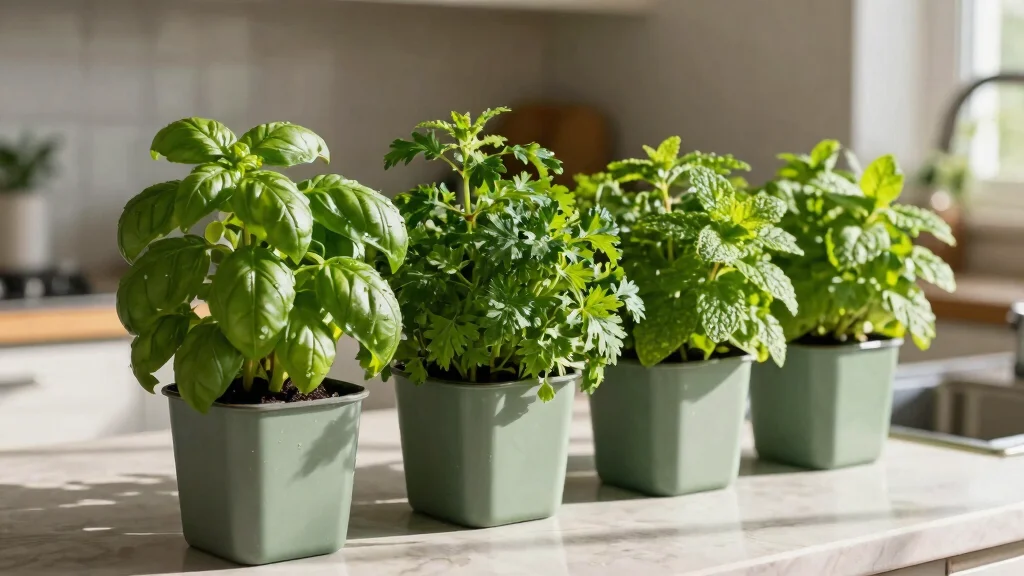
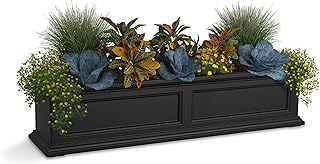
7. Window Box Planters
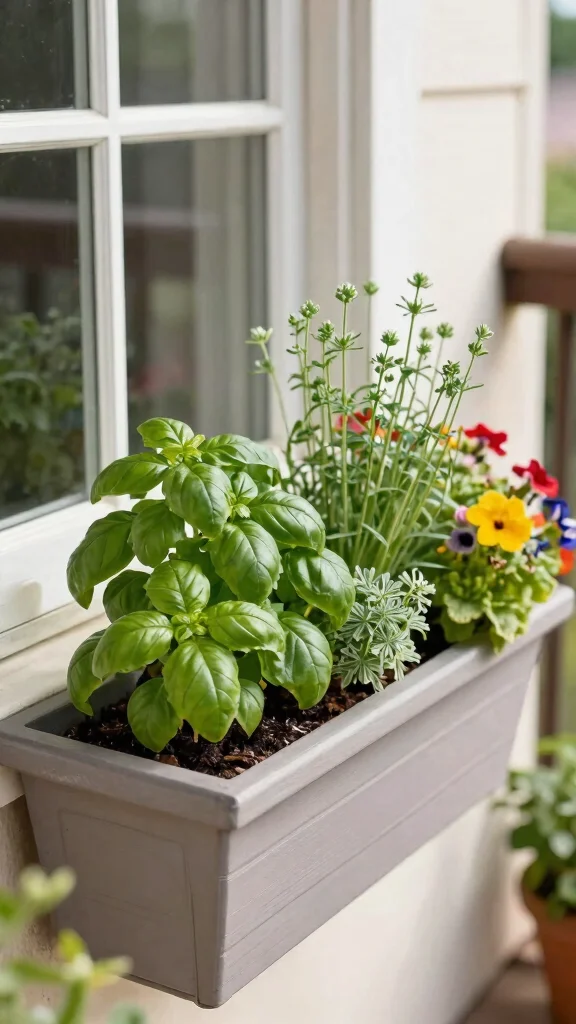
If you have a sunny window ledge or balcony, window box planters are an excellent way to grow fresh herbs! These planters save space while adding a delightful burst of greenery to your home. Imagine reaching for fresh herbs right from your window for cooking or garnishing.
Choose long boxes that fit your window comfortably and plant herbs that share similar sunlight and watering needs. This setup creates a charming view inside and out, perfect for any herb enthusiast.
Ingredients:
– Long window boxes
– Potting soil
– Selection of herbs
Instructions:
1. Select window boxes that fit your ledge well.
2. Fill with quality potting soil, leaving room for planting.
3. Plant herbs that require similar care and sunlight.
4. Consider adding a small trellis for climbing herbs.
5. Water regularly and enjoy the fresh herbs at your fingertips.
FAQs:
– Can I use regular pots? Window boxes are ideal as they maximize space and offer easier access.
– Can I grow herbs indoors? Yes, they thrive indoors with adequate sunlight.
Window Box Planters
Editor’s Choice
Burpee, 9 Quarts | Premium Organic Potting Natural Soil Mix Food Ideal f…
Seed Needs Herb Seeds Variety Pack Culinary Herb Collection (12 Individu…
Mayne Fairfield 4ft Window Box, Self Watering Flower Box with Double Wal…
8. DIY Concrete Planters
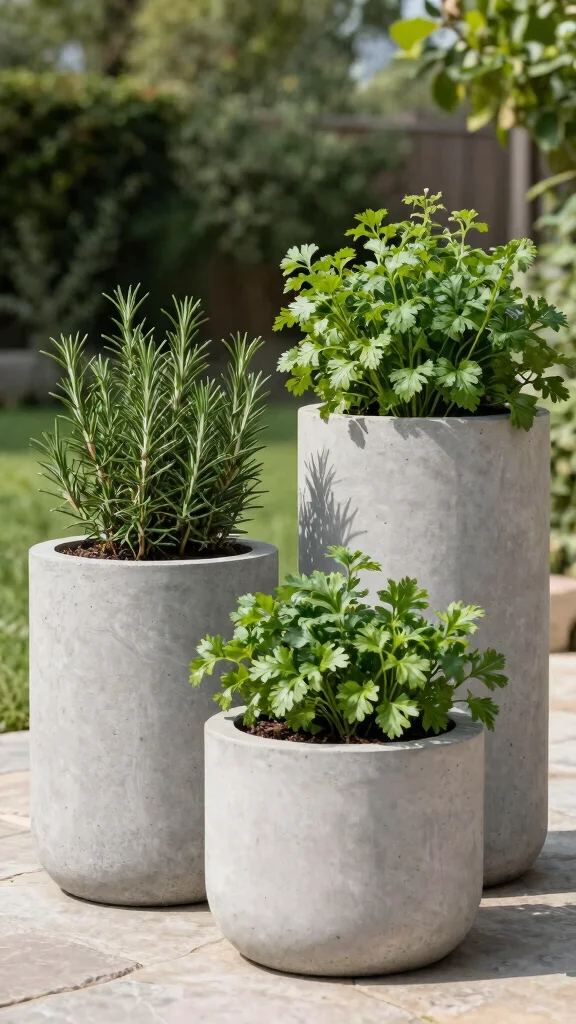
For a modern twist in your herb garden, try making DIY concrete planters! These durable and stylish planters add an industrial chic vibe to your outdoor space. With a little creativity, you can mold them into various shapes and sizes that suit your garden’s aesthetic.
Fill your concrete planters with soil and plant herbs that will thrive in your climate. Not only do they look great, but concrete also retains moisture well, making them ideal for warmer weather.
Ingredients:
– Silicone molds
– Concrete mix
– Potting soil
– Herbs
Instructions:
1. Use silicone molds to create your desired planter shapes.
2. Mix the concrete and pour it into the molds, letting it cure.
3. Once dry, fill the molds with potting soil.
4. Plant your chosen herbs and water them well.
5. Position your planters in a sunny location to thrive.
FAQs:
– Can I paint the concrete? Yes, you can paint them after they are fully cured.
– Can I use these indoors? Yes, as long as they have proper drainage.
You Might Also Like
DIY Concrete Planters
Editor’s Choice
Burpee, 9 Quarts | Premium Organic Potting Natural Soil Mix Food Ideal f…
Seed Needs Herb Seeds Variety Pack Culinary Herb Collection (12 Individu…

3 Pack Concrete Molds Silicone Planter Mold for Cement Pot DIY Succulent…
9. Herb Spiral Garden

Elevate your gardening game with an herb spiral garden! This innovative design efficiently uses both vertical and horizontal space, providing microclimates for a variety of herbs. It’s a functional and attractive way to grow multiple herbs in a limited area, making it a great conversation starter in your garden.
By gathering stones or bricks to form a spiral shape, you create a unique garden that not only looks stunning but also helps with water drainage. This method is perfect for those who want to grow a diverse range of herbs right at home.
Ingredients:
– Stones or bricks
– Potting soil
– Selection of herbs
Instructions:
1. Gather stones or bricks to form a spiral shape.
2. Fill the spiral with quality potting soil.
3. Plant herbs according to their sunlight needs, placing sun-loving herbs at the top.
4. Water regularly and maintain the garden for healthy growth.
5. Enjoy the variety of herbs your spiral garden provides!
FAQs:
– Can I build this in a small yard? Absolutely! Herb spirals are great for small spaces.
– Can I plant flowers too? Yes, you can incorporate flowers or other plants for added color.
Pro Tip: An herb spiral turns tiny spaces into thriving herb boxes outdoor. It stacks herbs in microclimates, improves drainage, and makes your garden a conversation starter. Grow more in less space with this smart, budget-friendly vertical solution.
Herb Spiral Garden
Editor’s Choice

Sustee Aquameter, Set of 5, Plant Soil Moisture Sensor (Green, Small)

FANTIAN 20 lbs Large River Rocks for Outdoor Landscaping, 3-4 Inch Decor…
Sereniseed Certified Organic Herb Seeds (10-Pack) – Non GMO, Heirloom …
Conclusion

Creating a stunning herb garden in small spaces is entirely possible with these nine budget-friendly ideas. From vertical gardens to repurposed materials, each option brings freshness to your cooking and beauty to your outdoor area.
Experiment with these herb boxes outdoor designs and discover what works best for your space. Who knows? You might just find a new favorite hobby in the process!
Note: We aim to provide accurate product links, but some may occasionally expire or become unavailable. If this happens, please search directly on Amazon for the product or a suitable alternative.
This post contains Amazon affiliate links, meaning we may earn a small commission if you purchase through our links, at no extra cost to you.
Frequently Asked Questions
Question: What are the best kinds of herb boxes for outdoor spaces on a budget?
Choosing the right herb boxes outdoor that fit your space and budget is easier than you think. For small space gardening, vertical planters, wall-mounted boxes, or shallow troughs work well. Look for inexpensive plastic, fiberglass, or repurposed crates; you can also build a DIY box with cedar or pine to keep costs low. Ensure drainage holes, use a high-quality potting mix with compost, and fill per box with 2-3 herb types. Watering is key: set up a simple drip line or a self-watering wicking system to save time. Place the boxes in a sun-filled spot (aim for about 6-8 hours of sun). Start small and expand later.
Question: How can I build a DIY vertical herb box for a small balcony or wall?
Build a vertical herb box for a balcony or wall by reusing pallets, cedar planks, or a hanging shoe organizer. Steps: plan a sturdy frame, drill drainage holes, line with landscape fabric, and create compartments so roots don’t tangle. Fill with a light, well-draining potting mix. Plant herbs in layers, top-to-bottom: basil and oregano up high; thyme and chives lower. Mount securely on a sunny wall or fence. Water regularly and consider a simple drip line or self-watering insert. This approach nails small space gardening and container gardening in one creative package.
Question: Which herbs perform best in outdoor herb boxes and how should I care for them?
Herbs that perform best in outdoor herb boxes include basil, oregano, thyme, rosemary, parsley, chives, and mint (in its own pot to prevent spreading). Provide at least 6 hours of sun, in well-draining soil. Use a quality potting mix, water when the top inch dries, and fertilize lightly with a half-strength liquid fertilizer every 4-6 weeks. Prune regularly to maintain compact size and encourage bushy growth. Harvest leaves before flowering for best flavor. Watch for pests like aphids; encourage good air circulation and avoid overwatering. These are classic herb gardening tips.
Question: What are practical tips to keep an outdoor herb garden affordable and productive?
To keep an outdoor herb garden affordable in the budget-friendly gardening sense, start with a small 1-2 box setup and reuse containers. Look for end-of-season sales, cuttings, or seeds from kitchen herbs. Choose versatile herbs that cover many recipes to maximize value in container gardening. Build boxes with inexpensive materials (wood, concrete blocks, or repurposed crates) and fill with a cheap, well-draining potting mix. Irrigation can be simple—hand-water daily or add a cheap drip line. Map out where sun and shade fall to minimize waste and ensure you get the most from every inch of your outdoor herb garden.
Question: What maintenance should I expect for my herb boxes outdoor across seasons?
Seasonal maintenance for herb boxes outdoor is straightforward. In spring, refresh soil, prune dead wood, and transplant herbs if needed. Summer demands steady harvesting, check moisture daily in hot weather, and provide shade if heat spikes. Fall, harvest before frost and consider protective covers; Winter, either bring containers indoors or protect with mulch and windbreaks. Rotate herbs annually to reduce disease; prune regularly to keep plants productive. Inspect for pests and use organic controls as needed. This routine fits into a simple small space gardening workflow and keeps your outdoor herb garden thriving year-round.
Related Topics
herb boxes outdoor
container gardening
small space gardening
budget-friendly gardening
vertical gardening
herb gardening tips
easy DIY
urban gardening
fresh herbs
beginner friendly
outdoor gardening
seasonal herbs